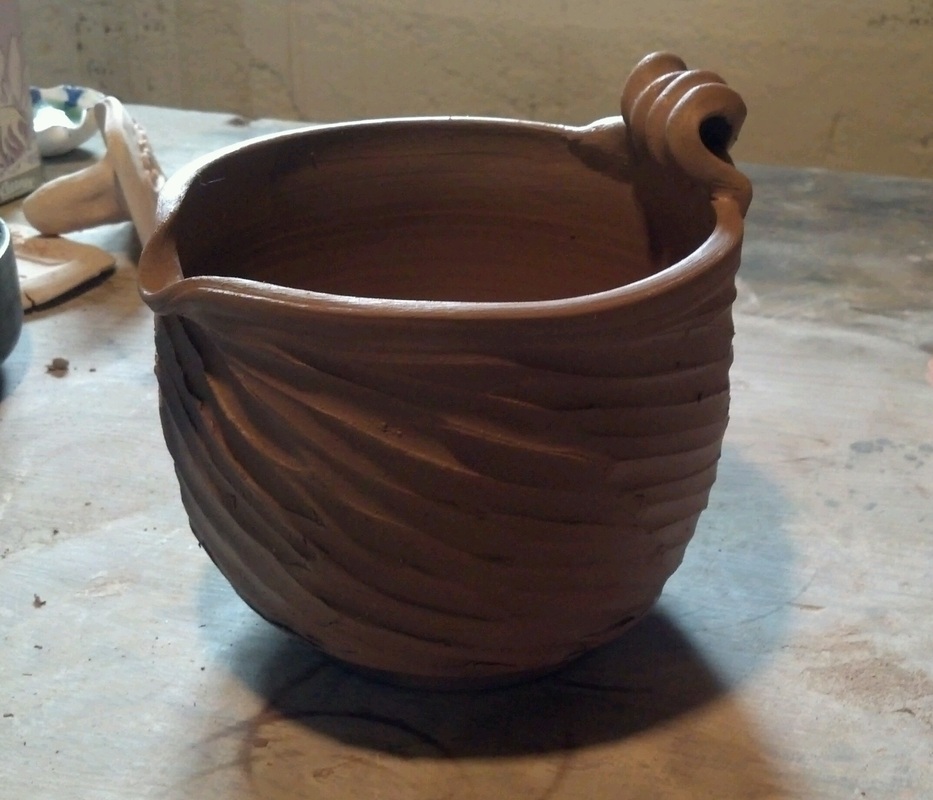
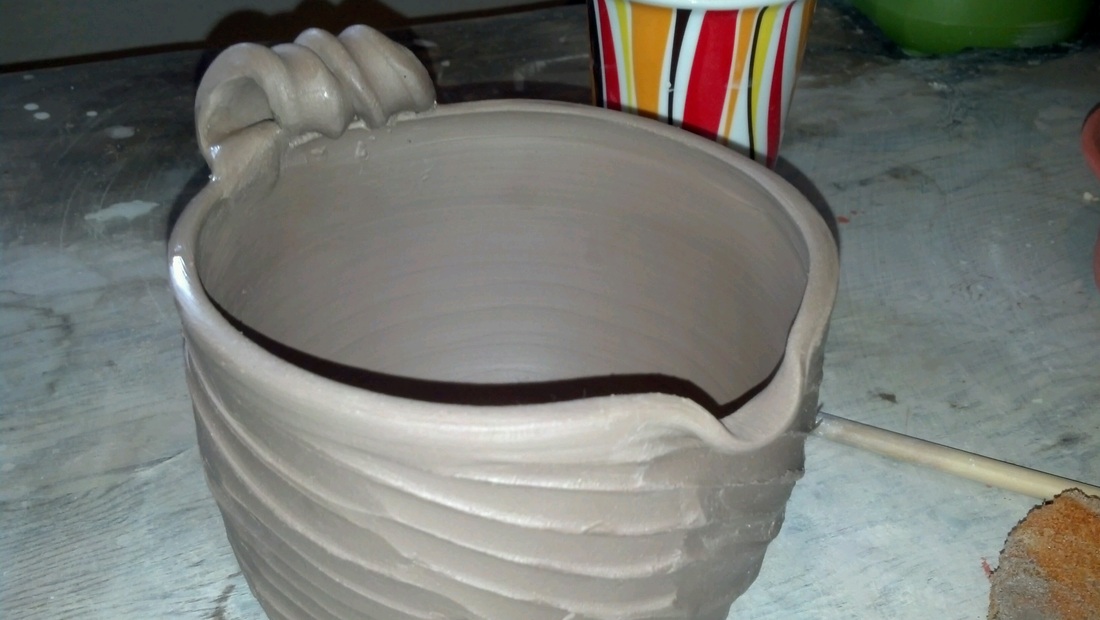
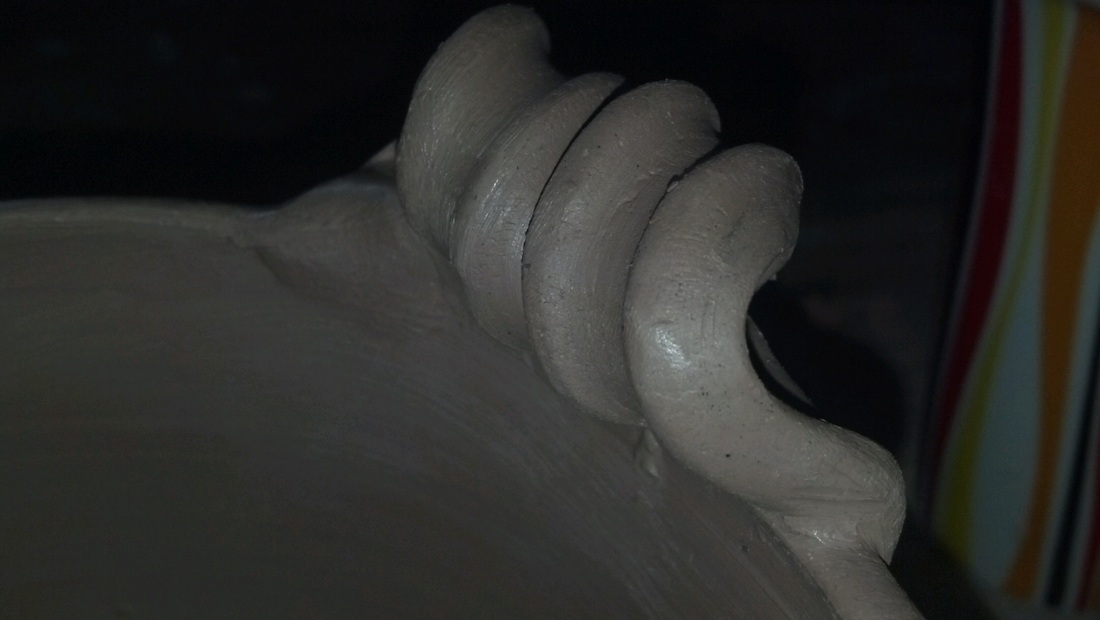
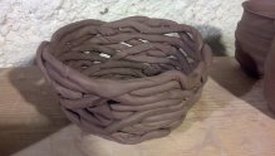
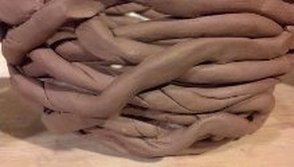
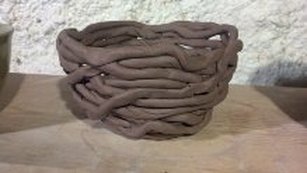
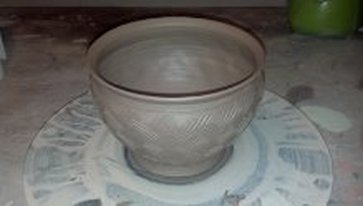
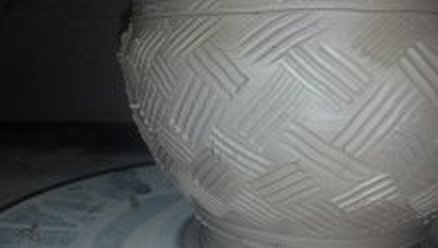
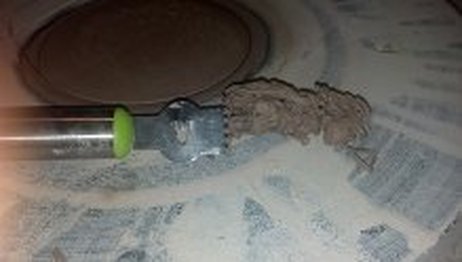
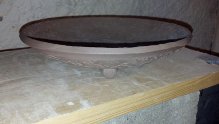
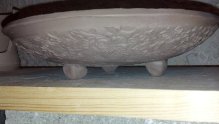
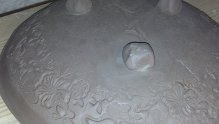
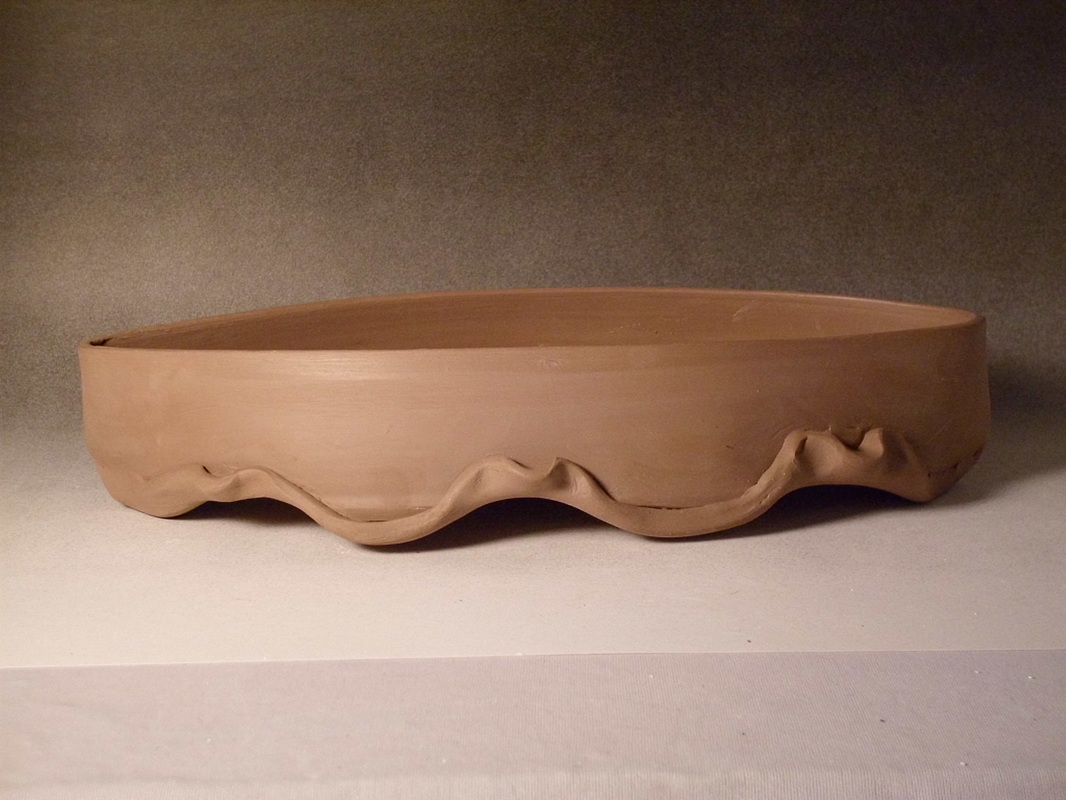
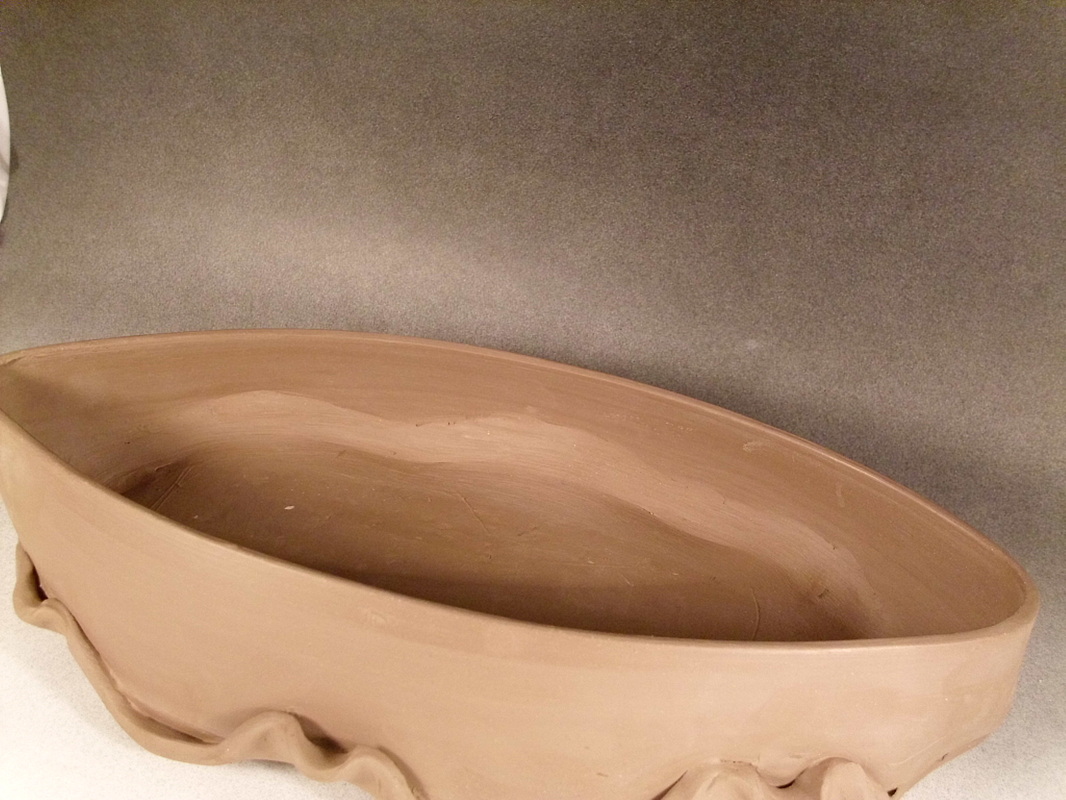
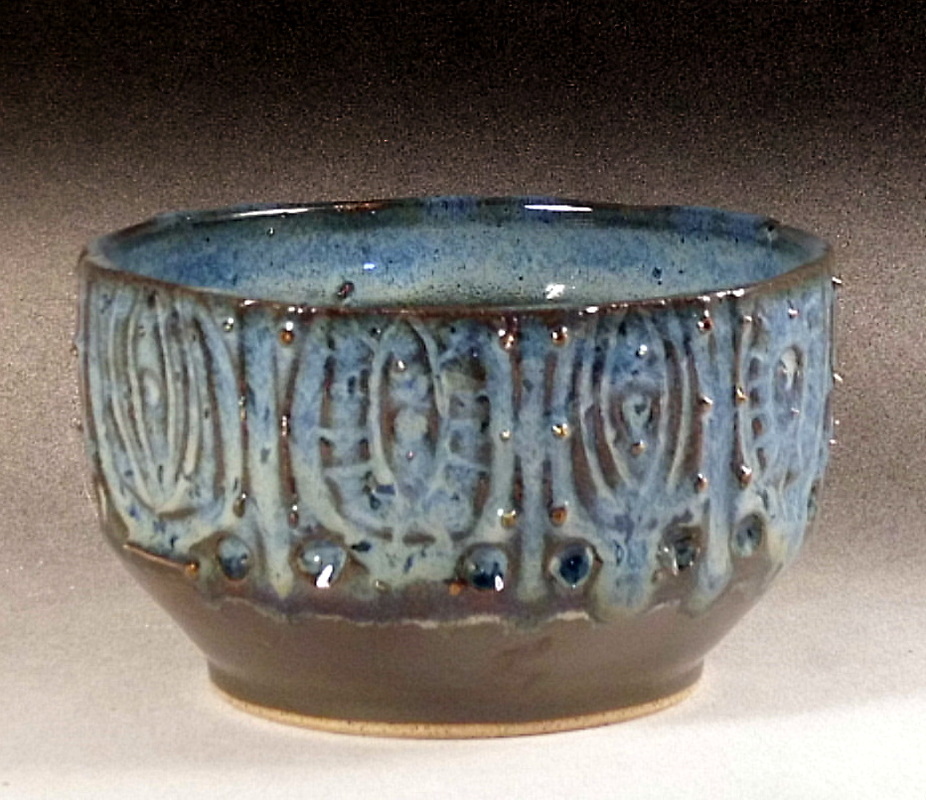
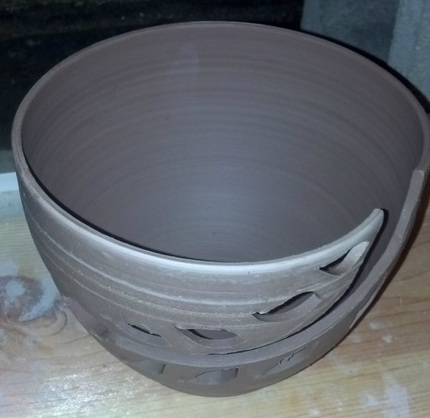
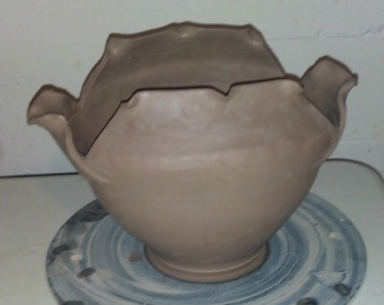
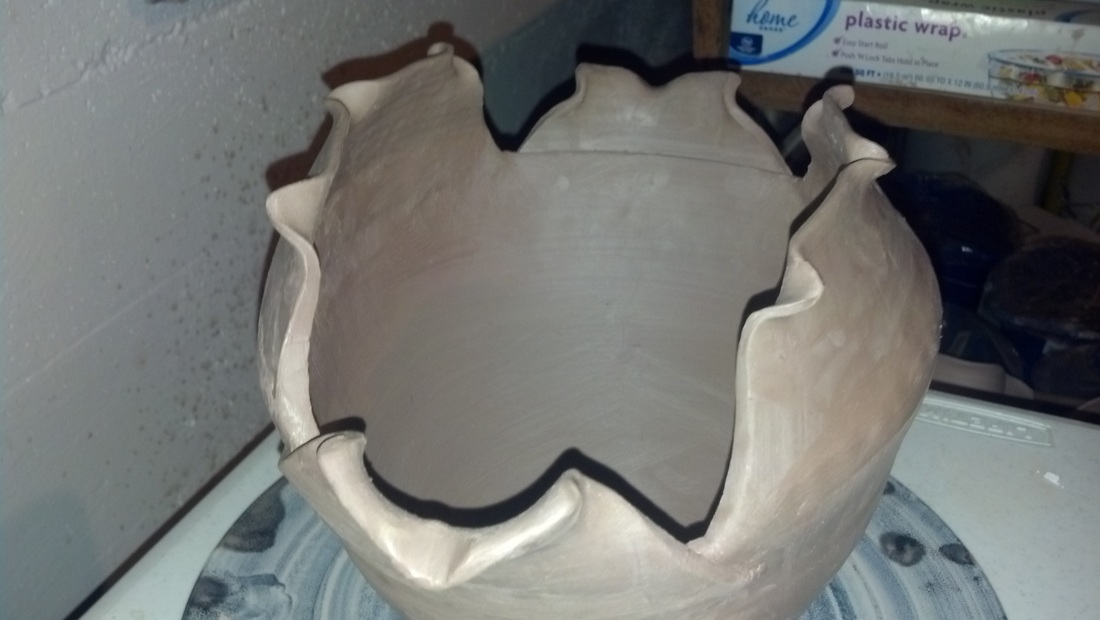
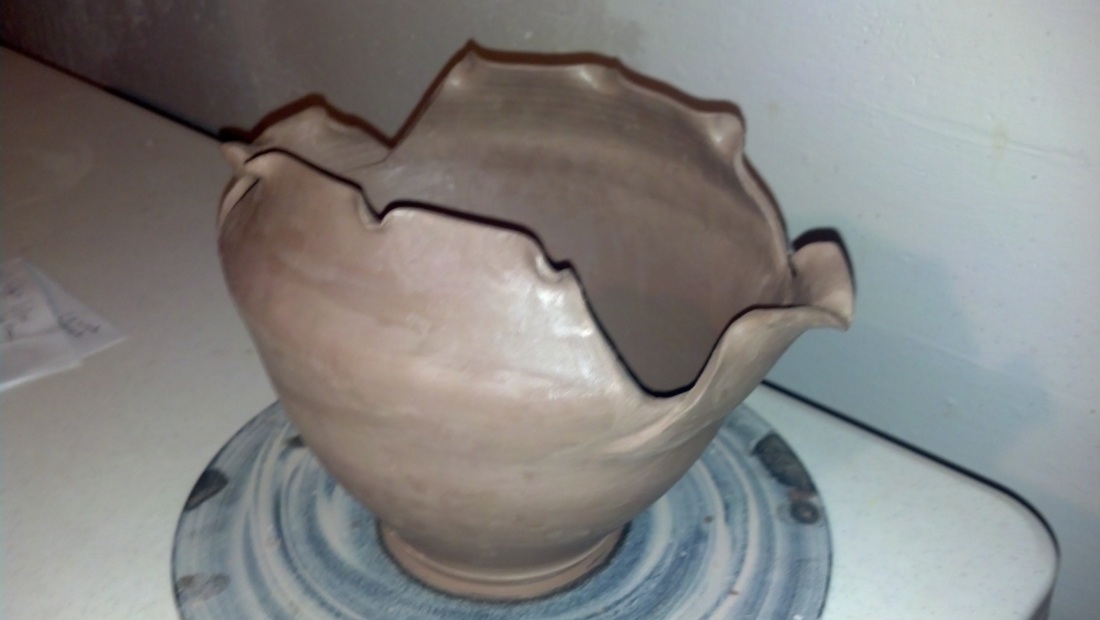
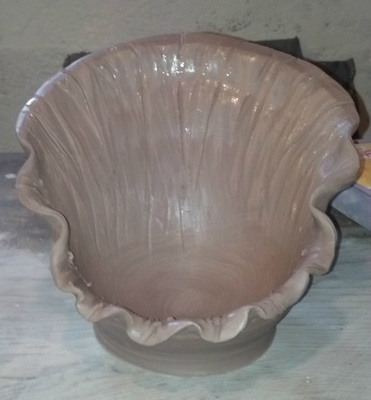
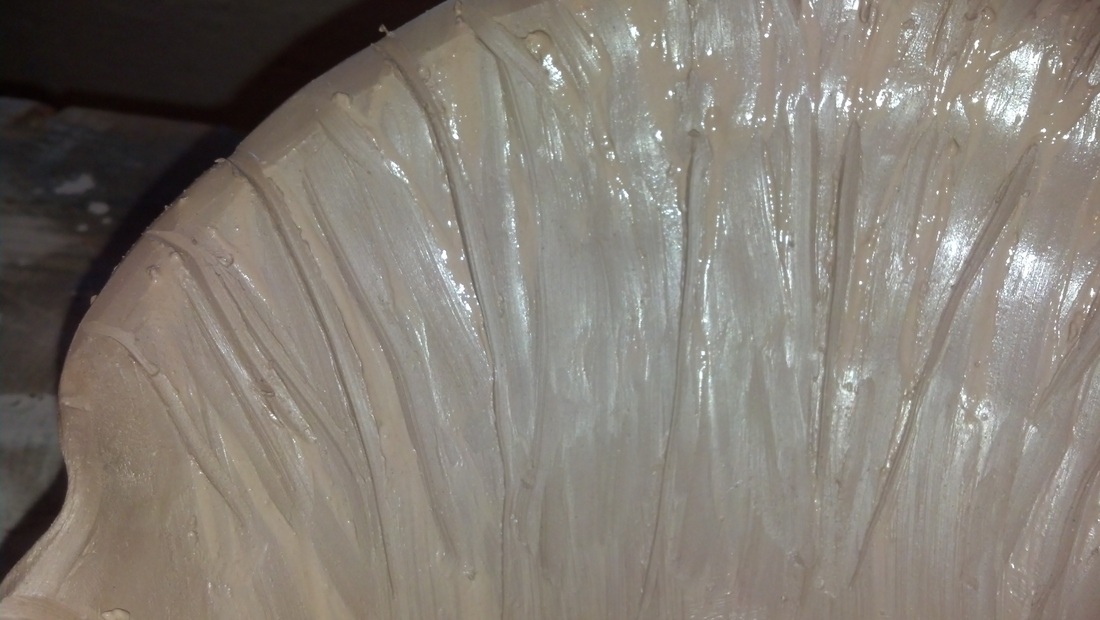
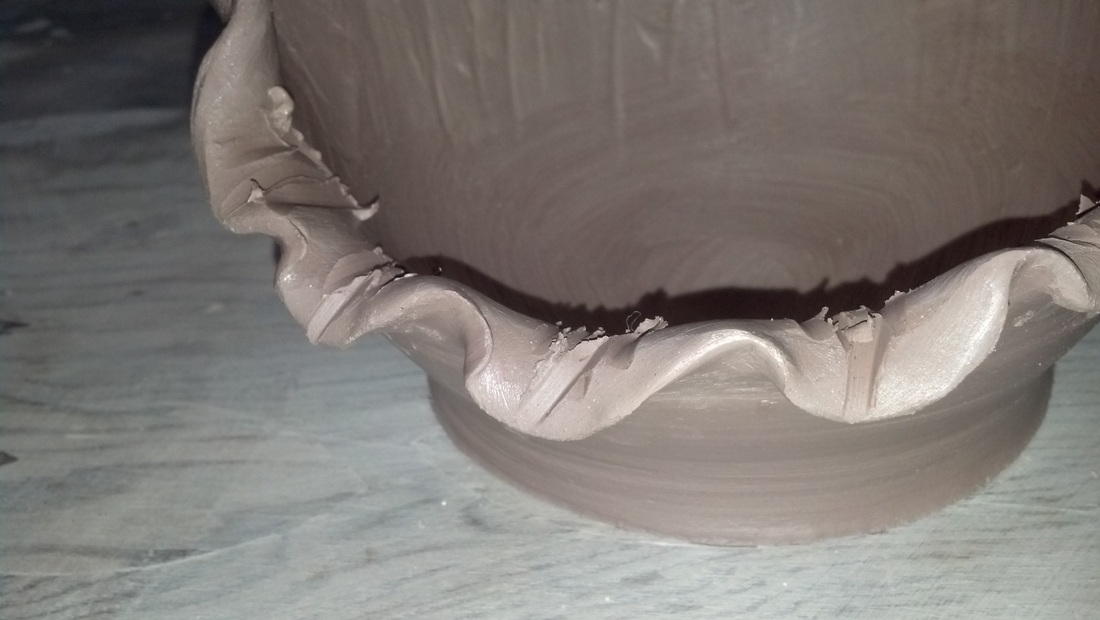
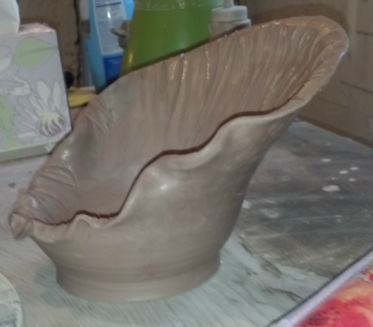
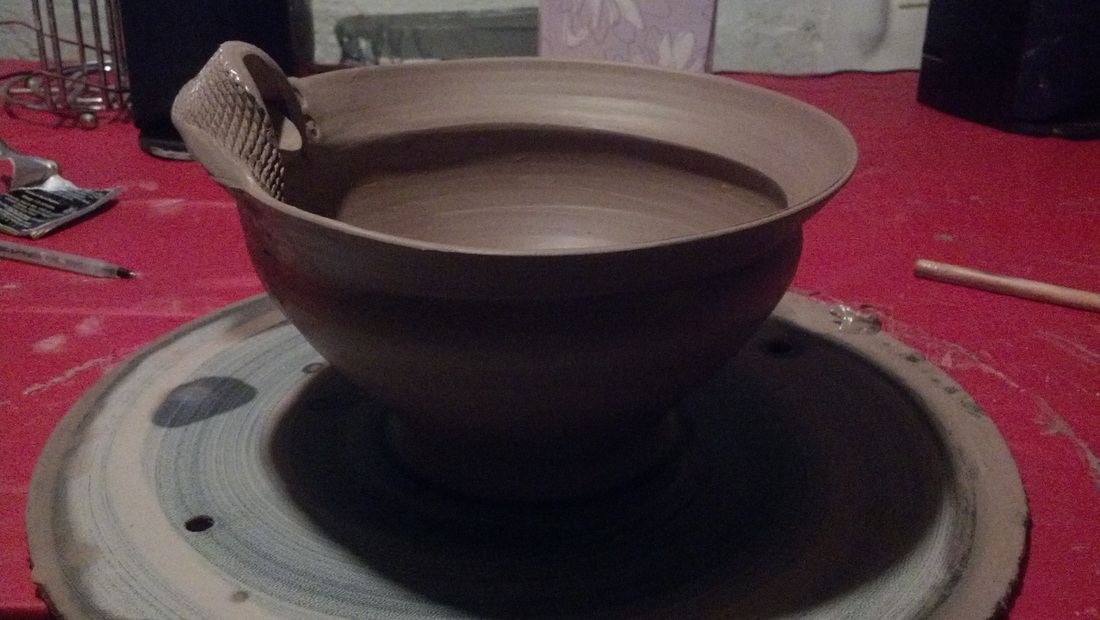
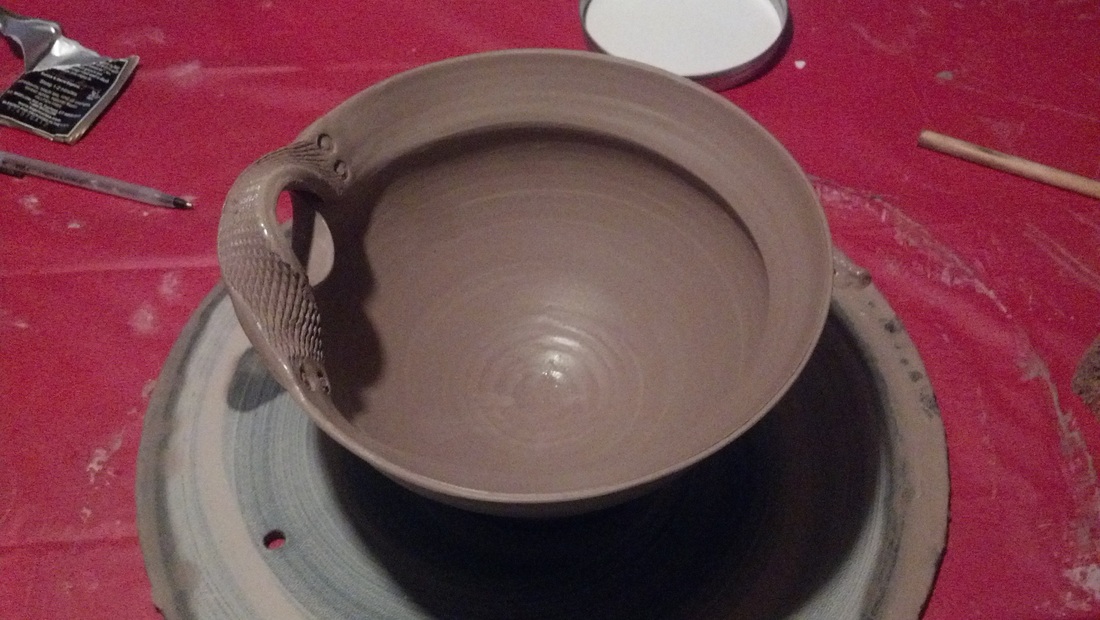
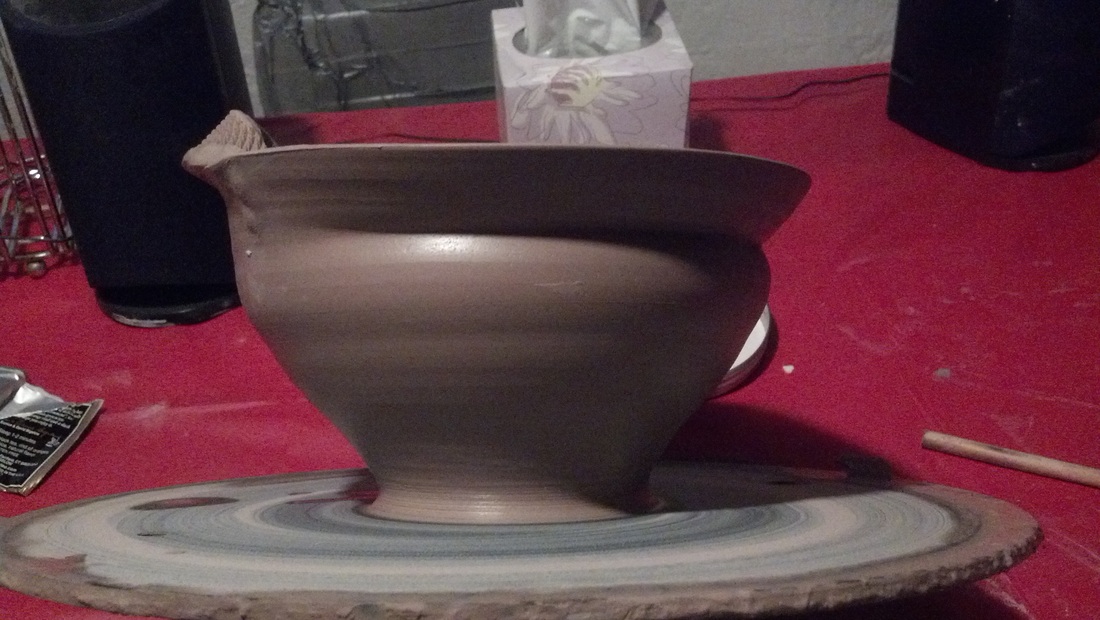
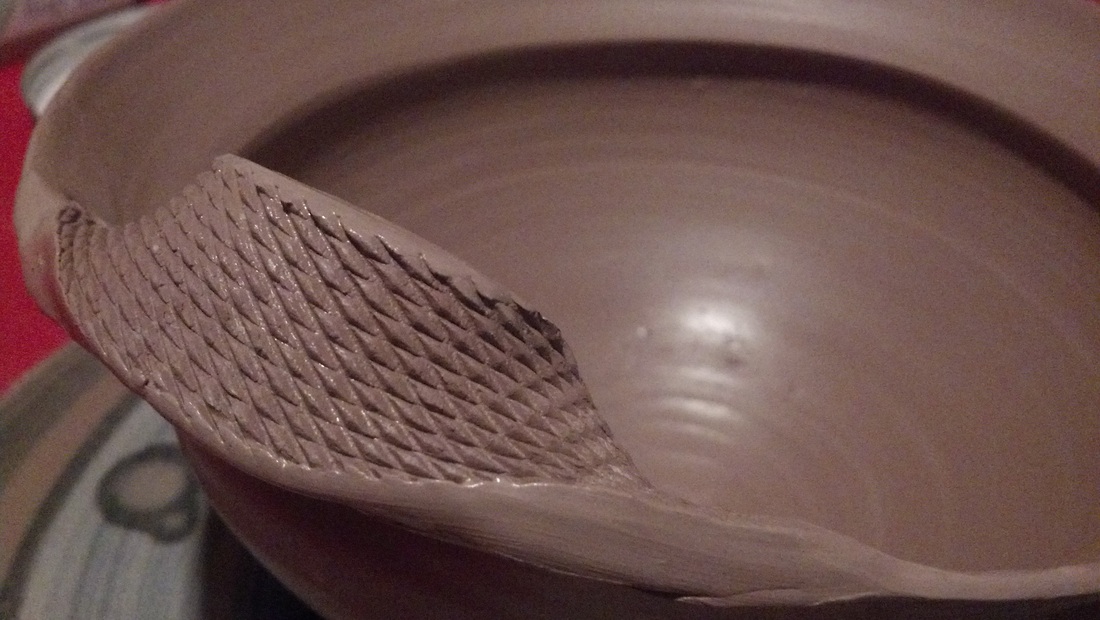
I love this bowl! it makes me want to do every piece from now on with this texture. I just know the glazing over that texture is going to rock! I took a workshop in Kansas city Missouri a few years ago and Mark Peters taught us this technique. I had forgot about it, but got one of my ceramic arts daily emails and...boom...there it was! I knew right away that I was going to do that bowl for this week. the technique is taking a stretched out spring and cutting off a thin layer of clay, then you stretch it out to the shape you want. the facets on the outside stretch and twist when you do this...its just hard because you cannot touch the outside! anyways it was a fun bowl that turned out very successful and inspiring.
2 Comments
This idea came from Stephenie Wooten. She is a pottery student of mine, avid crafter and gardener and friend! I know it might look like worms right now, but once it's glazed, It'll look like branches or twigs....I hope haha I used a bowl for the mold and covered it with plastic wrap, then started to make coils or twigs. It was really hard for me to get them irregular! I have worked so hard in the past to make my coils even haha. I put slight texture in each coil and a base for the bottom. I am excited to glaze!
I saw this done on YouTube. It appealed to me right away because I love texture and I love my Nana. My Nana is a very talented weaver. She has a studio in Columbia City, IN. She has been weaving for close to 20 years and can make anything from a purse to a huge blanket! She's made scarves, rugs, and even clothing. My Nana has taught weaving, too. She started doing shows to support her hobby. Watching her do those shows and going to help and visit her at the shows, really opened my eyes to the art fair world. Seeing her sell her creations let me know it was possible for me to do it too! Thanks, Nana, for setting such a great creative example for me! I love you! I made the texture with a citrus zester! Again, not my idea, but sure cool! Try it!
How fun is this bowl? FUN! I think i just really want it to be spring. Today is Easter Sunday so, if you celebrate, Happy Easter! This bowl was created by rolling out a slab and then texturing it with this really cool rubber brayer I purchased from tjmaxx (ya...tjmaxx is pretty much awesome) then i placed it on a hump mold and added some more texture and little feet. I let it set up for a day and trimmed the rim and smoothed with a sponge! easy peasy! but it looks sophisticated. I want to do more with these new hump molds i have.
I am really excited about this bowl! It isn't completely my design. I get emails from ceramic arts daily and this one really inspired me! I had to try it. Martha Grover makes a pot similar to this one and she was my inspiration. Martha and I's work is very similar so it's no suprise that I would have loved that email. I am by no means saying I am as good of a potter as Marth, but we do share the same respect and longing for clay with movement and soft edges! I think if you look at this weeks bowl and compare it to the past couple bowls, it fits right in.
I threw a bottomless ring on the potters wheel then let it stiffen up. Then i pulled it into an oval and attached a base to it. I then cut out some feet and encouraged the clay to "ripple". I love this form. So many of my favorite pots are oblong and oval in shape! I think it's probably just because it's something different, but who cares. :) This bowl was so fun! And "uniquely functional" lol. It's a yarn bowl! I threw the bowl pretty normal, just trying to keep it more vertical than wide, then i let it dry and trimmed the bottom. Then came the fun part, I carved out this pretty leaf design. The idea is that the ball of yarn can sit in the bowl and then the string is fed through the carved out stem and out through the leaf on the tip. I do not knit, but had a wholesale order to fill and decided to make an extra one for the blog! I think it's a perfect idea for what I specialize in- "uniquely functional ceramics"!
Ok, I LOVE this bowl! I seem to be in a floral theme, but that's ok! maybe spring will come early haha. Truth be told, I had no idea where I was going with this bowl when I started. I threw a medium sized bowl on the pottery wheel then set it aside. Then, I threw a ring of clay without a bottom. I used this ring to create the "petals". After joining all the four petals, I realized I could have just thrown a bigger bowl and then cut out the parts I didn't need and then I would not have had to join all that clay (time consuming), but then again, I wouldn't have come up with this design that way either. They way I came up with this Oval Flower Bowl was a sort of a trial and error approach. I just cut of parts of the ring and held them up to the thrown bowl until I saw a pattern that I liked. At first this bowl was very geometrical. Then I added then swoops and curls along the rim and that's when I started to see "flower" and when I started to like the pot. But there was still something about it, so I squished in the sides, creating an oval and BAM! it hit me, I liked it! :) Sometimes good things just happen. I let the clay speak to me on this one, and it paid off. It's gonna sound weird, but I think this chunk of clay wanted to be an oval flower bowl :)
OK, I know it looks kinda weird now, BUT I have high hopes for glazing. The raw clay color really takes away from the soft floral look I was going for. I just really want it to be spring. I think that's why I made this bowl. I am not sure what you could use it for. Maybe a serving bowl or mabye for keys. I like how drastically different the two sides are and i love the wavey rim and the linear texture. Can't wait to glaze this one :)
I love this picture! itsn't the texture so fun! This bowl is going to be a new staple at the Sarahmics Pottery booth this year! I love how "uniquely functional" it is! the handle just makes it that much for fun to use. It is a serving bowl so it's big enough for pasta, potatos, veggies, ect! The handle is both visually appealing and has the functional aspect too! two things i definitely look for in a staple piece! I love the rim of the bowl, how it has that line. This will allow me to glaze the rime a different color if i want and have a spot to stop at that makes sense. The rims color will probably be the handle's color as well. I also just noticed (love when i luck out like this) that the handle is the same width as the rim so that line isn't broken from rim to handle! The fluidity of line is important to me ever since i heard Lorna Meaden talk about it at a conferance I attended with the Potter's Council in Kasas City, MO. Maybe I didn't luck into this feature, maybe my mind did it without telling me....
|
Pots In UseI love seeing handmade pots in action! Functional pottery has stolen my heart. I intend to explore that love story a little more with this blog. Follow along if you want to see an talk about functional pottery on a deeper level! Archives
April 2015
|